> For the complete documentation index, see [llms.txt](https://ai-docs.fptcloud.com/llms.txt). Markdown versions of documentation pages are available by appending `.md` to page URLs; this page is available as [Markdown](https://ai-docs.fptcloud.com/fpt-gpu-cloud/gpu-virtual-machine/on-fpt-cloud-console/tutorials/security-group.md).
# Security Group
## Overview
A **Security Group** is a **network-based, stateful firewall service** for GPU virtual machines. It is provided **at no additional cost**.\
Security Groups control both inbound and outbound traffic — any traffic **not explicitly allowed** by a rule is **automatically blocked**.
{% hint style="warning" %}
The total number of rules across all Security Groups is **limited to 100**.\
To request an increase in this limit, please **contact FPT Smart Cloud support**.
{% endhint %}
## The default Security Group
A default security group is automatically created when you create a VPC, and it allows all outbound network traffic. The rules for this security group cannot be modified.
The following outbound rules are added by default:
| Type | Protocol | Port range | Action | IP type | Destination |
| ------ | -------- | ---------- | ------ | ------- | ------------------- |
| Custom | UDP | 547 | ALLOW | IPv6 | ff02::1:2/128 |
| HTTP | TCP | 80 | ALLOW | IPv4 | 169.254.169.254 |
| Custom | UDP | 67 | ALLOW | IPv4 | All |
| HTTP | TCP | 80 | ALLOW | IPv6 | fe80::a9fe:a9fe/128 |
## Create a Security Group
{% stepper %}
{% step %}
In the left-side menu, go to **Networking → Security Group**, then click **Create Security Group**.
{% endstep %}
{% step %}
Enter the required information in the **Create security group:**
* **Name**: Enter a name for the Security Group. The system automatically generates a default name for quick setup.
* **Applied Instances**: Select the GPU VM name to associate it with the Security Group.
* **Add Tags**: Optional, for better resource organization.
* **Configure security rules**: Update Inbound and Outbound rules
{% endstep %}
{% step %}
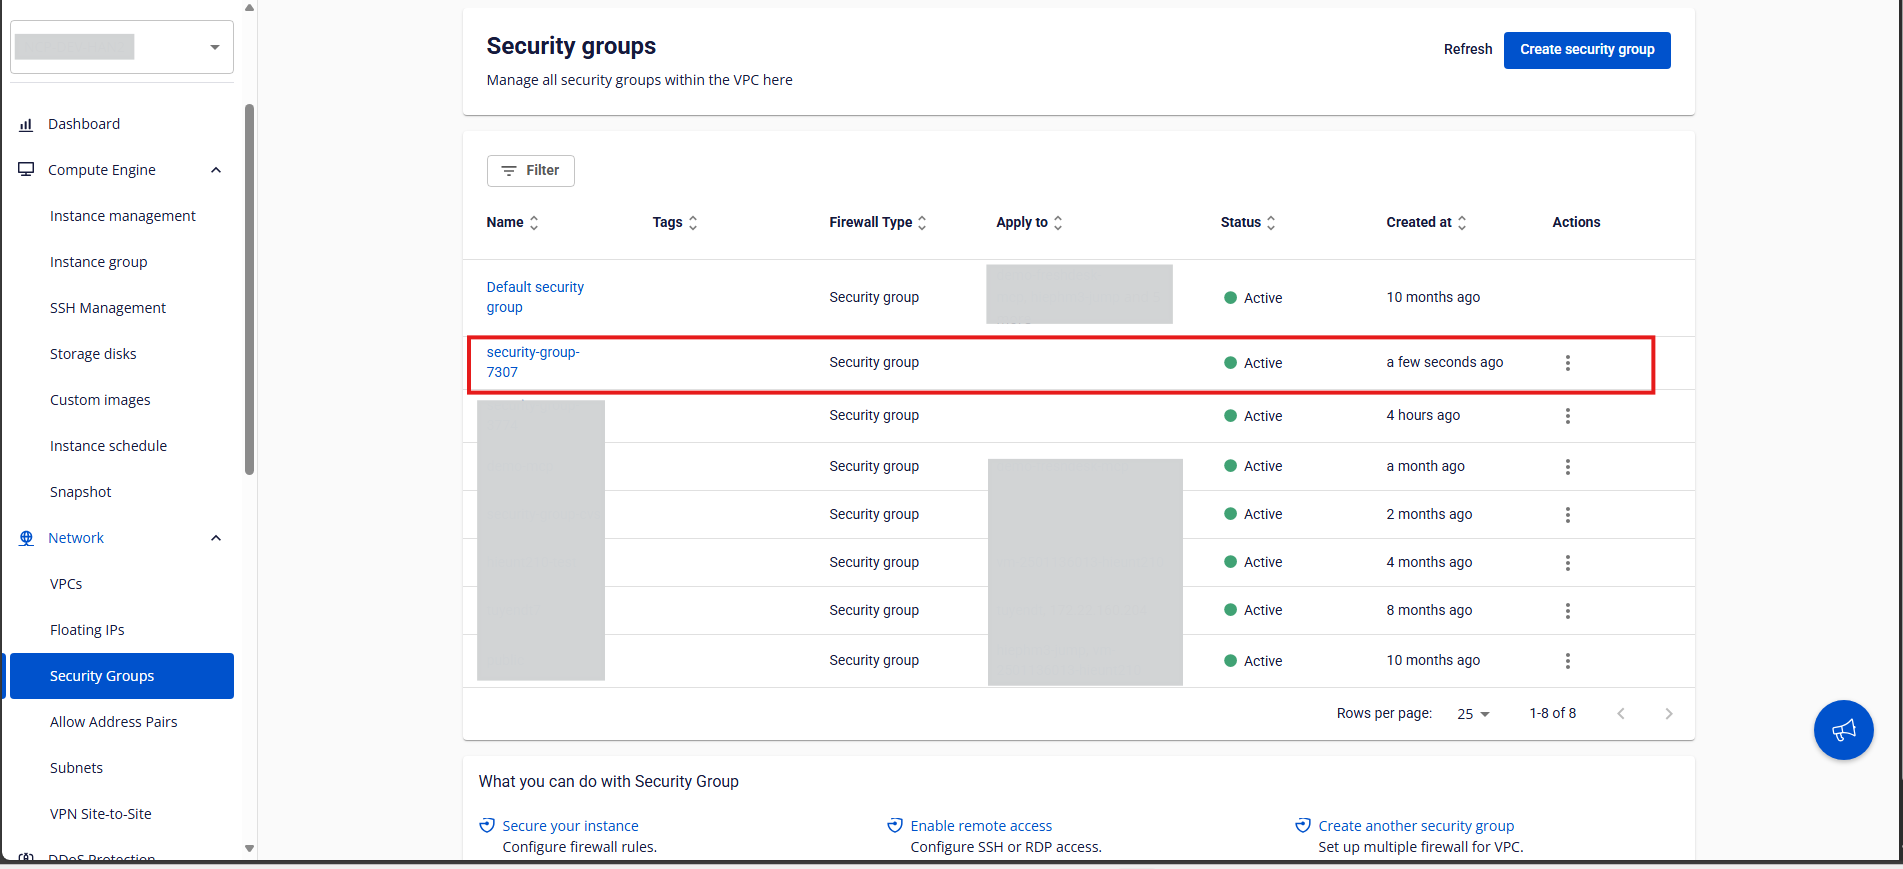
Confirm by clicking "**Create Security Group**". The newly created Security Group will appear in the list.
{% endstep %}
{% endstepper %}
## Manage Rules
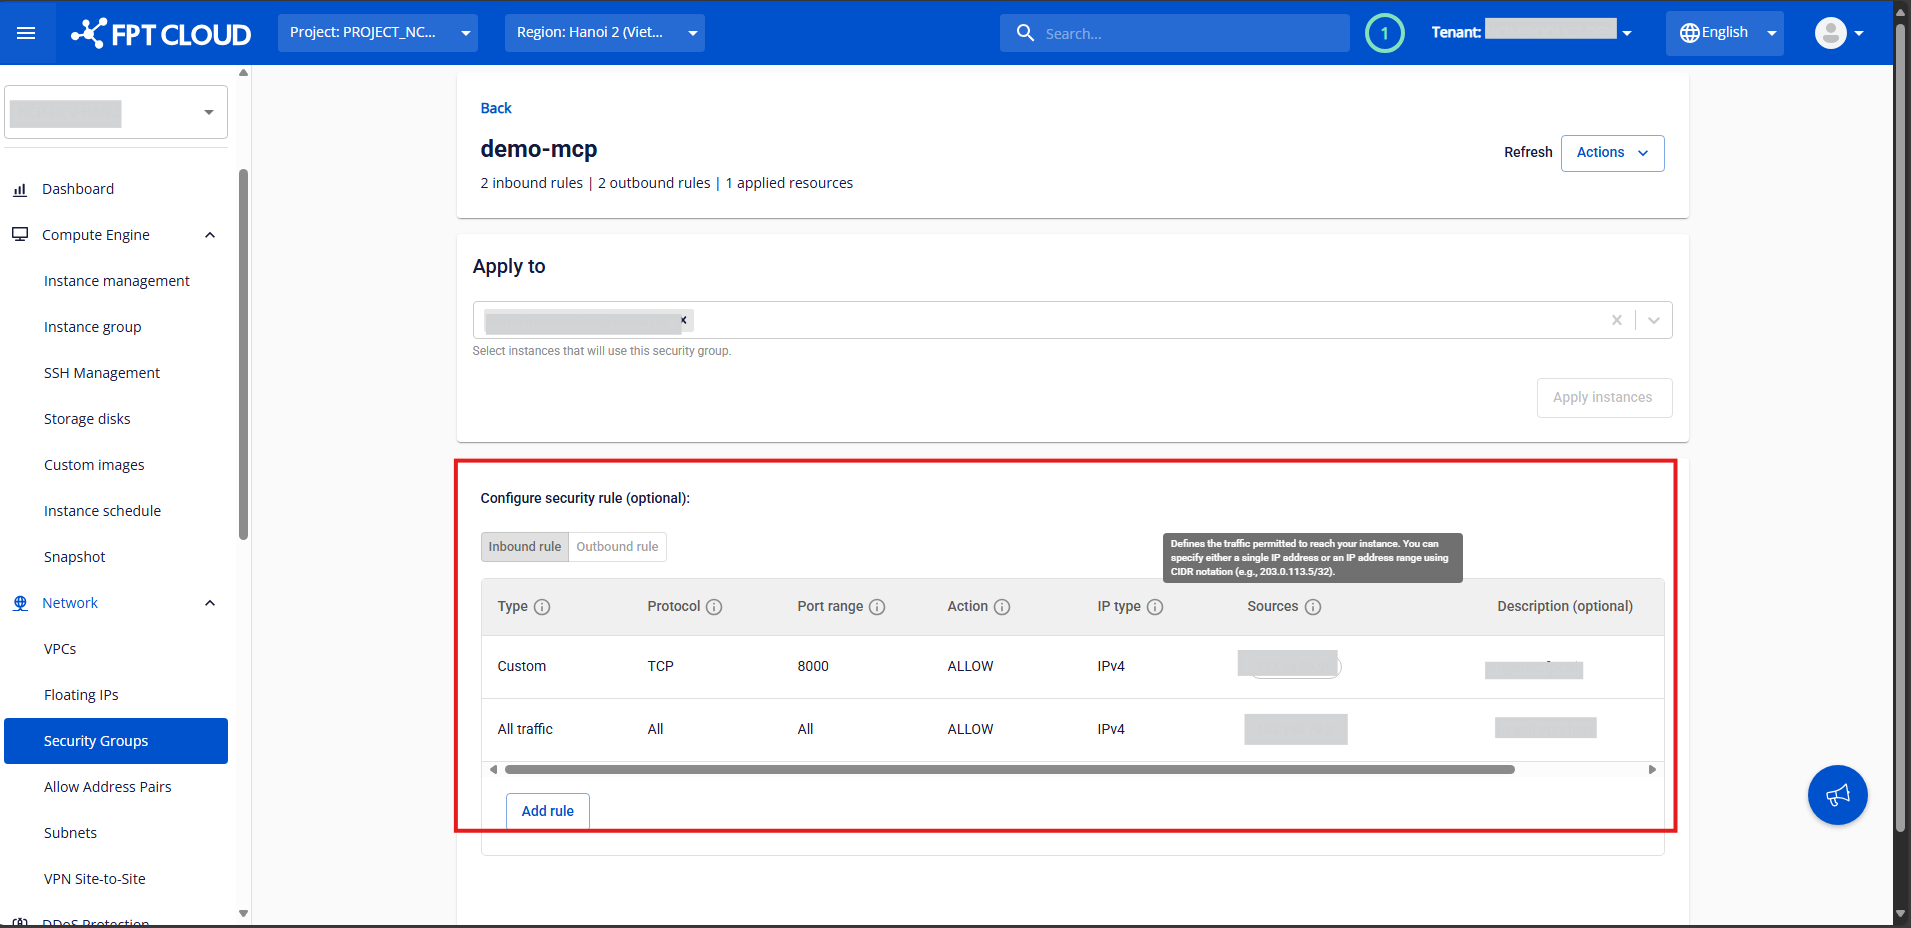
A single Security Group can contain multiple Inbound and Outbound rules.
1. **Inbound Rules:**
* Control incoming traffic to the instance.
* Define which **ports** on the instance are open and which **IP addresses** from the internet can access them (**Source**).
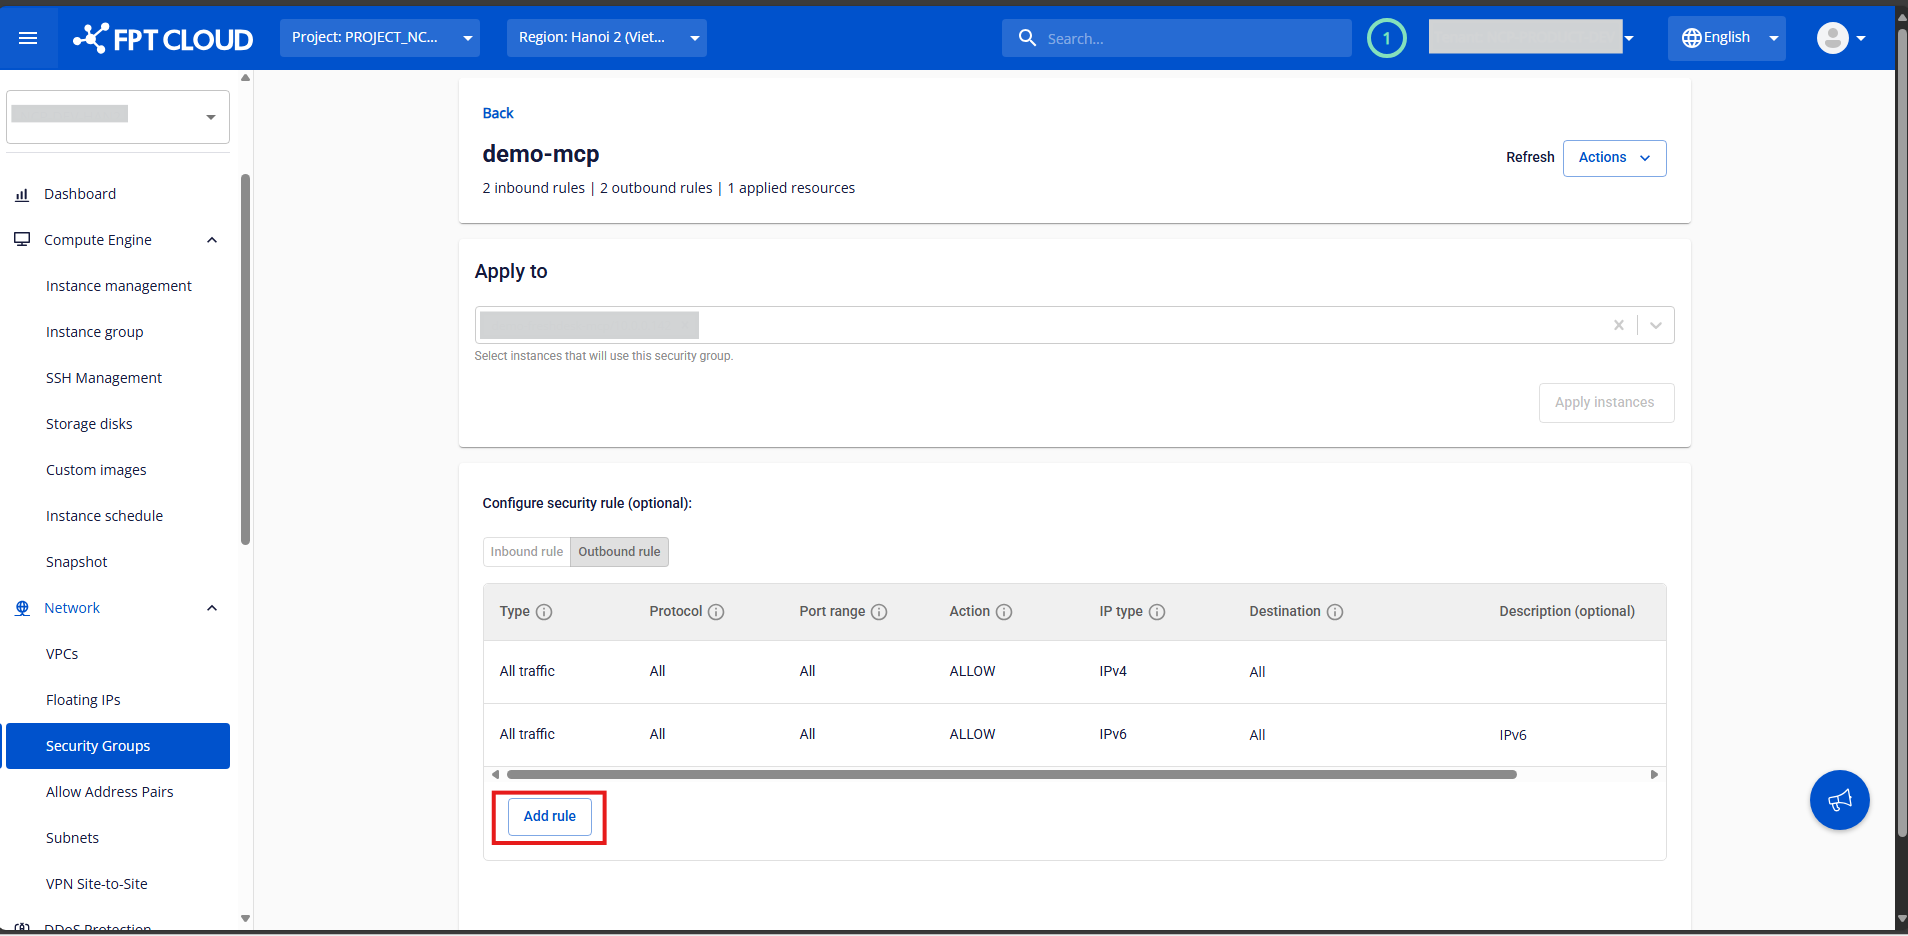
2. **Outbound Rules:**
* Control outgoing traffic from the instance.
* Define which **ports** on the instance can send traffic out and to which **destination addresses**.
### **Adding or Editing Rules**
{% stepper %}
{% step %}
In the **Security Group Management** page, select the Security Group you want to manage to open its **details page**.
{% endstep %}
{% step %}
In the **Inbound Rules** or **Outbound Rules** section, click **Add New**.
{% endstep %}
{% step %}
Fill in the rule information:
* **Port:** Select the port(s) to open.
* Choose **All Ports** to open all ports.
* Choose **Customize Ports** to specify one or a range of ports.
* The system provides quick options for common services like **SSH (22)**, **RDP (3389)**, **MySQL (3306)**, **HTTP (80)**, and **HTTPS (443)**.
* **Sources / Destinations:** Enter the IP addresses allowed to connect to the specified ports.
* **All IPv4:** Allow connections from all IPs.
* **My IP:** Allow only your current public IP.
* **Custom:** Enter one or more specific IP addresses.
{% hint style="warning" %}
For sensitive ports like **22 (SSH)** or **3389 (RDP)**, the system will display a warning if you allow **All IPv4**:\
*“We recommend allowing SSH from trusted IPs only.”*
{% endhint %}
* **Description:** Optional notes for the rule.
Click **Add Rule** to continue adding more, or **Edit Security Group** to save your changes.\
The system will process the configuration and display a result notification.
{% hint style="info" %}
**Recommendation**
* Add a new inbound rule for SSH access: **Type**: SSH; **Port Range**: 22; **Source**: All IPv4
* To enhance security when enabling SSH access, please **allow only trusted IP addresses** and **avoid using “All IPv4” (0.0.0.0/0).**
{% endhint %}
{% endstep %}
{% endstepper %}
## Attach a GPU VM
{% stepper %}
{% step %}
In the **Security Group Management** page, select the Security Group you want to attach to a virtual machine.
{% endstep %}
{% step %}
In the **Apply To** section, select the virtual machines to attach.\
You can also specify a **CIDR range** to apply the Security Group to a network segment.\
Click **Apply Instances** to confirm.\
The system will process and display the result.
{% endstep %}
{% endstepper %}
## Detach a GPU VM
{% stepper %}
{% step %}
In the **Security Group Management** page, select the Security Group currently attached to the virtual machine.
{% endstep %}
{% step %}
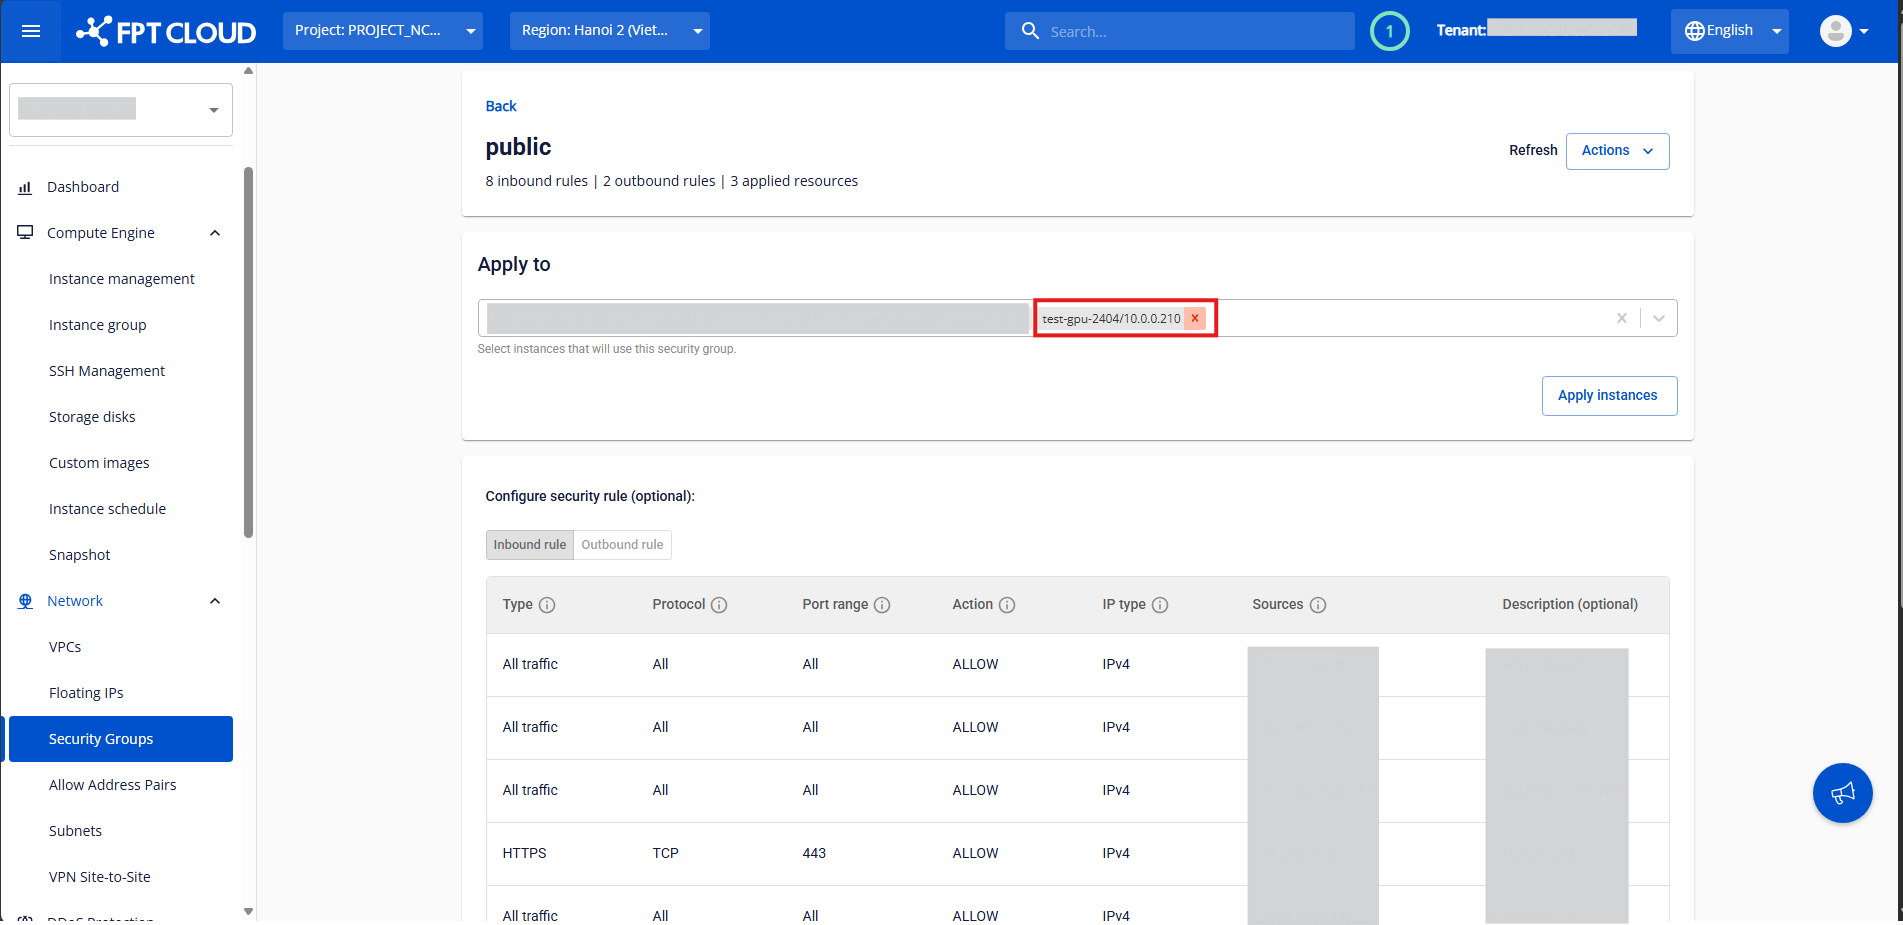
In the **Apply To** section, locate the instance you want to remove.\
Click the **X icon** next to it, then click **Apply Instances** to confirm.\
The system will process and display the result.
{% endstep %}
{% endstepper %}
## Delete a Security Group
If you no longer need a Security Group, you can delete it from the VPC.
{% hint style="warning" %}
**Note:**\
All **rules must be deleted first** before the Security Group can be removed.
{% endhint %}
{% stepper %}
{% step %}
In the **Security Group Management** page, select the Security Group you want to delete to open its details page.
{% endstep %}
{% step %}
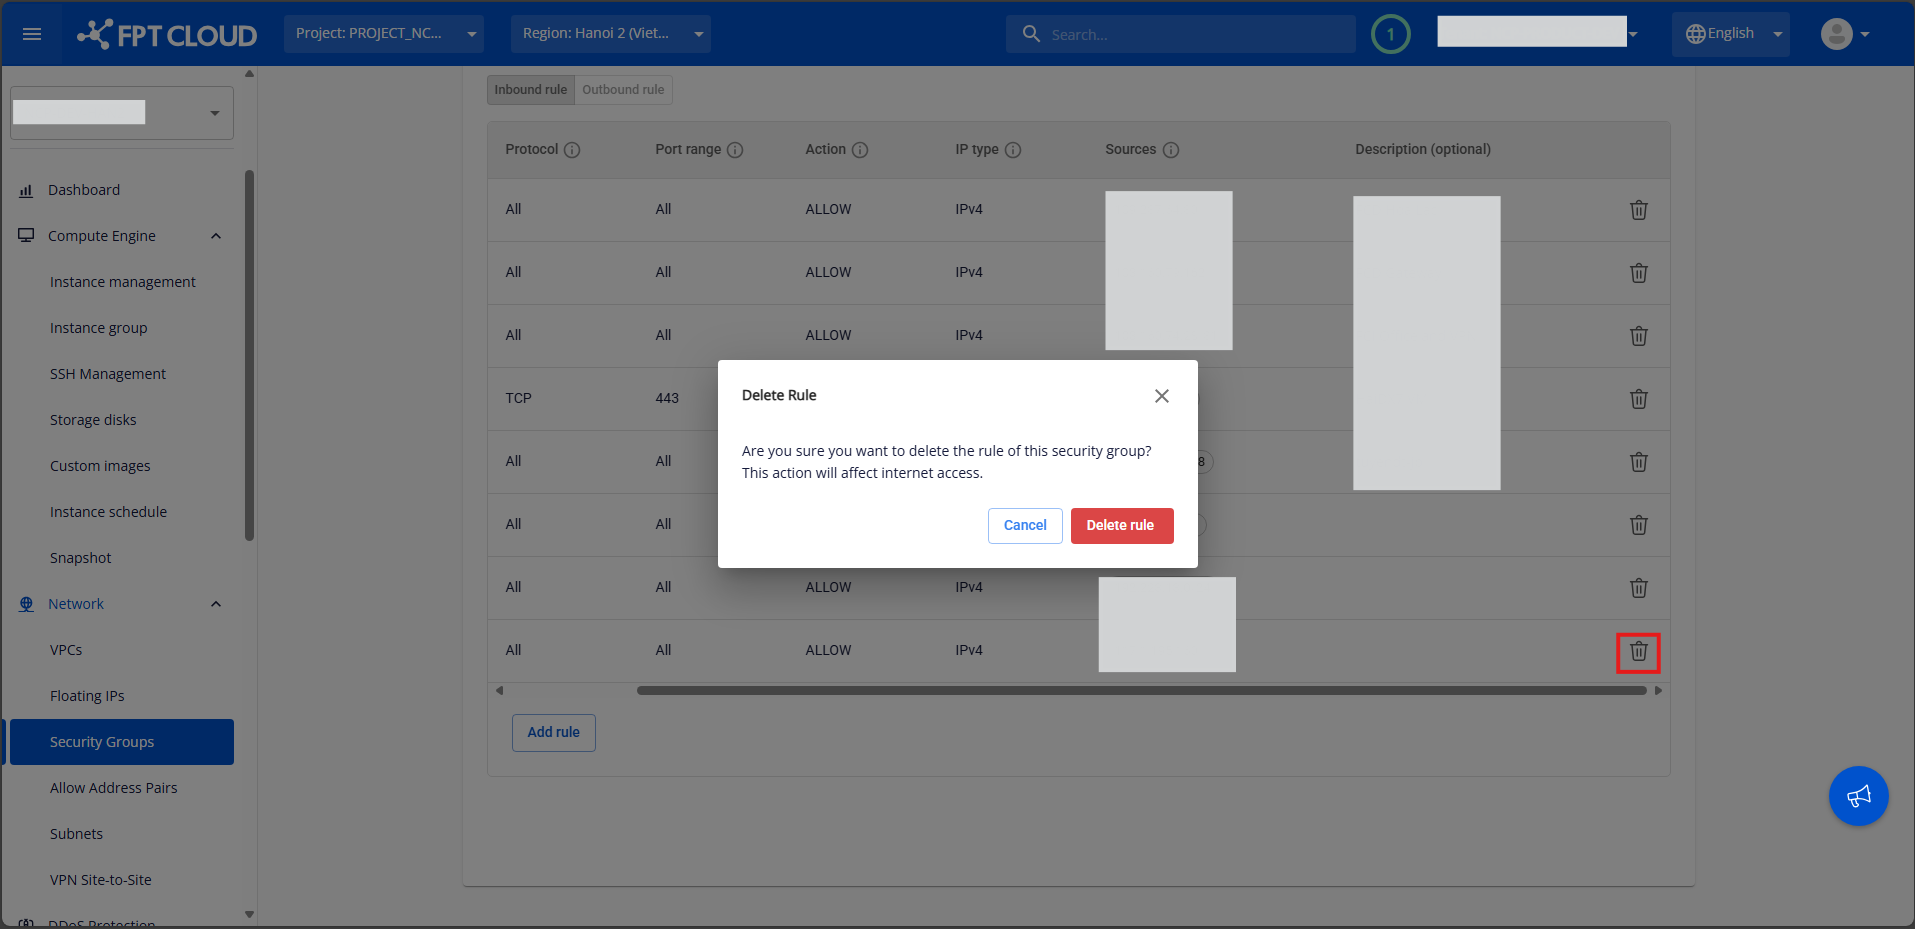
Delete all rules by clicking the **trash icon** next to each rule and confirming deletion.
{% endstep %}
{% step %}
After all rules have been deleted, return to the **Security Group list**.\
Under the **Actions** column, select **Delete** for the Security Group you want to remove.
{% endstep %}
{% step %}
A confirmation pop-up will appear.\
Click **Delete Security Group** to confirm.\
The system will process and display the result.
{% endstep %}
{% endstepper %}
---
# Agent Instructions
This documentation is published with GitBook. GitBook is the documentation platform designed so that both humans and AI agents can read, navigate, and reason over technical content effectively. Learn more at gitbook.com.
## Querying This Documentation
If you need additional information that is not directly available in this page, you can query the documentation dynamically by asking a question.
Perform an HTTP GET request on the current page URL with the `ask` query parameter, and the optional `goal` query parameter:
```
GET https://ai-docs.fptcloud.com/fpt-gpu-cloud/gpu-virtual-machine/on-fpt-cloud-console/tutorials/security-group.md?ask=&goal=
```
`ask` is the immediate question: it should be specific, self-contained, and written in natural language.
`goal` is optional and describes the broader end goal you are ultimately trying to accomplish on behalf of the user. GitBook uses it to tailor the answer towards what is most useful for that goal.
The response will contain a direct answer to the question and relevant excerpts and sources from the documentation.
Use this mechanism when the answer is not explicitly present in the current page, you need clarification or additional context, or you want to retrieve related documentation sections.