
✌️pfSense Network Gateway
What is pfSense?
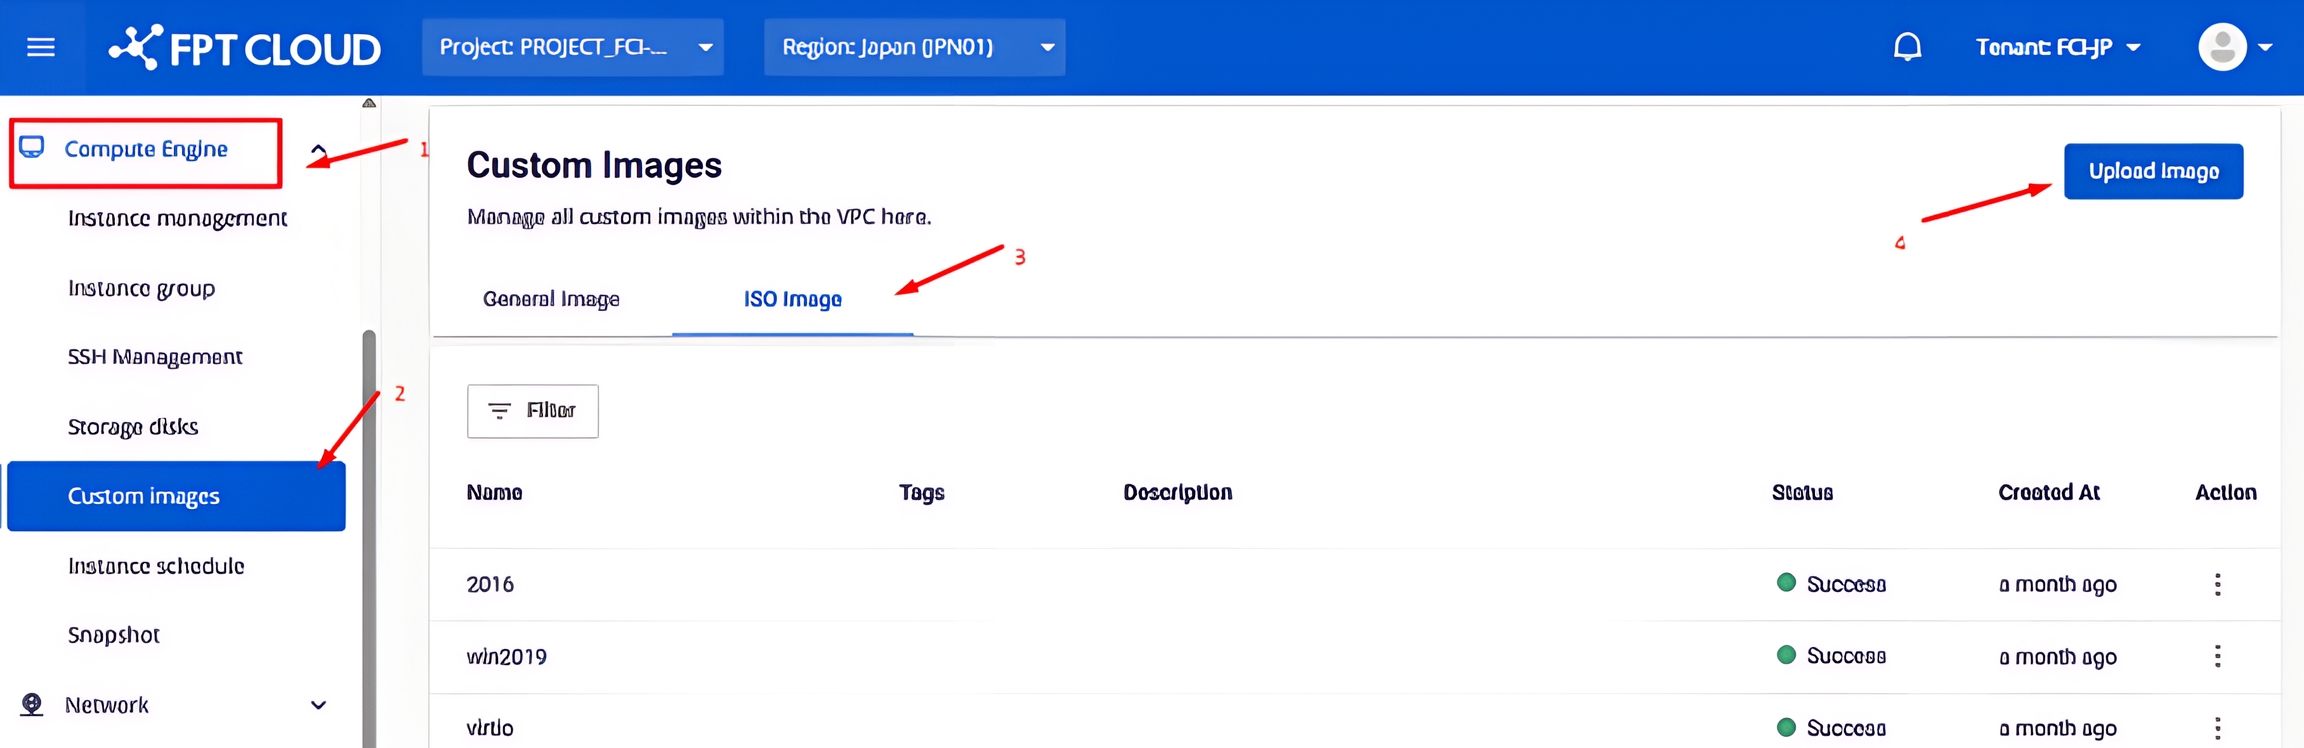
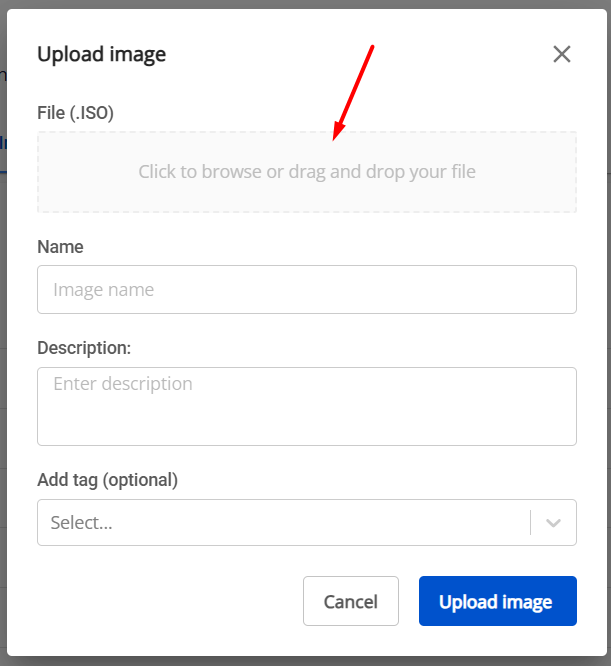
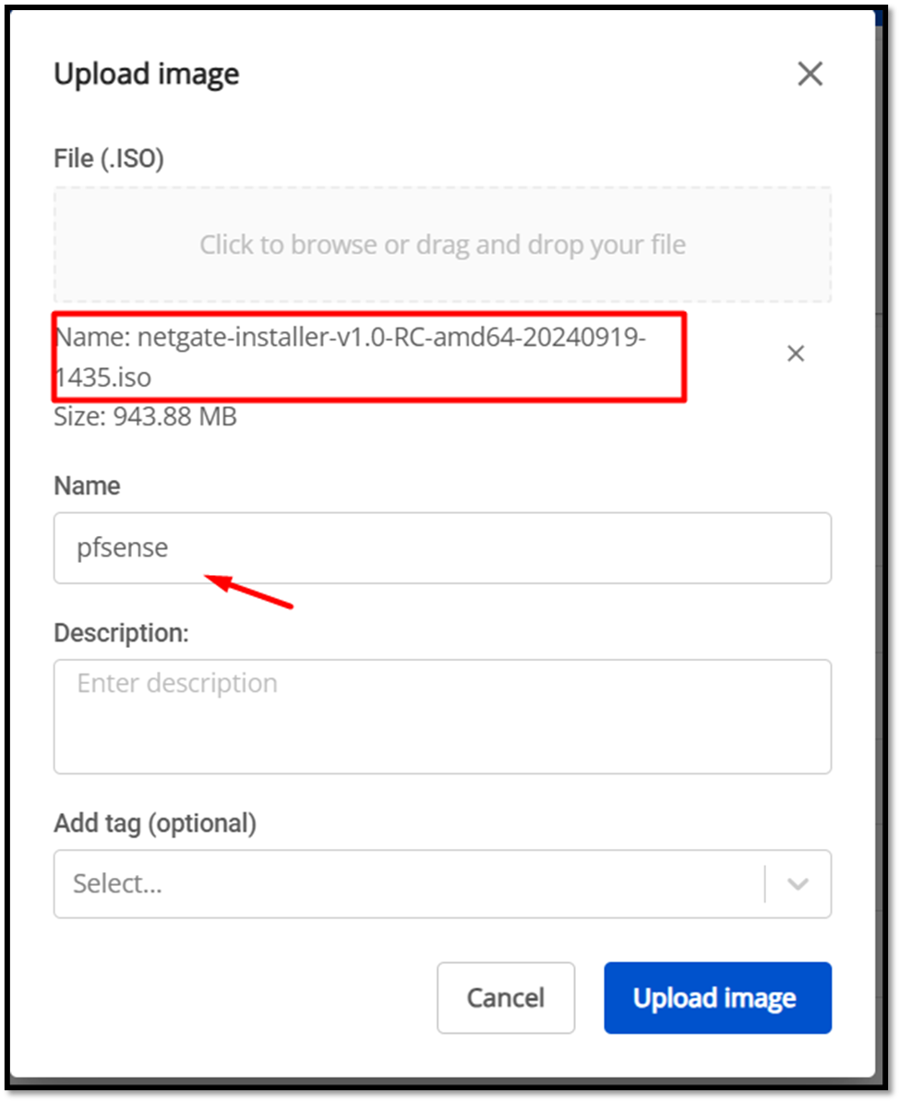
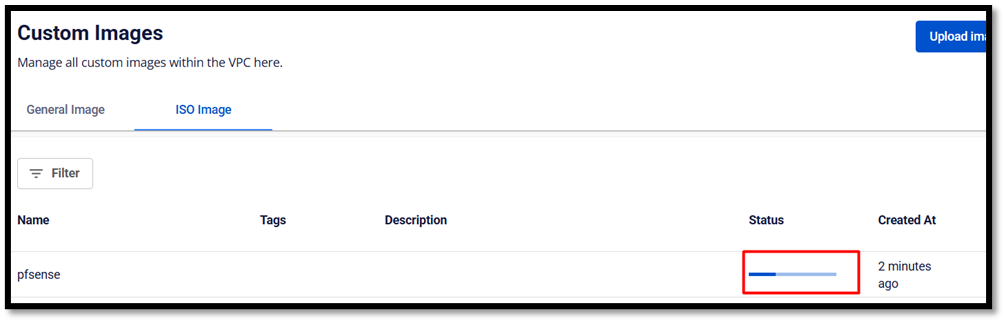
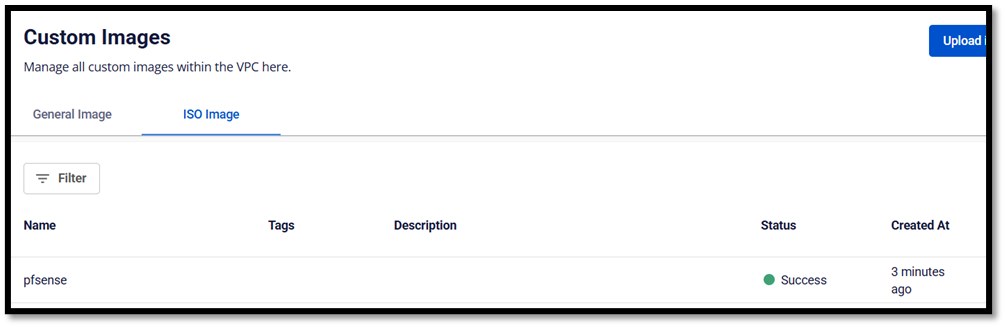
File preparation
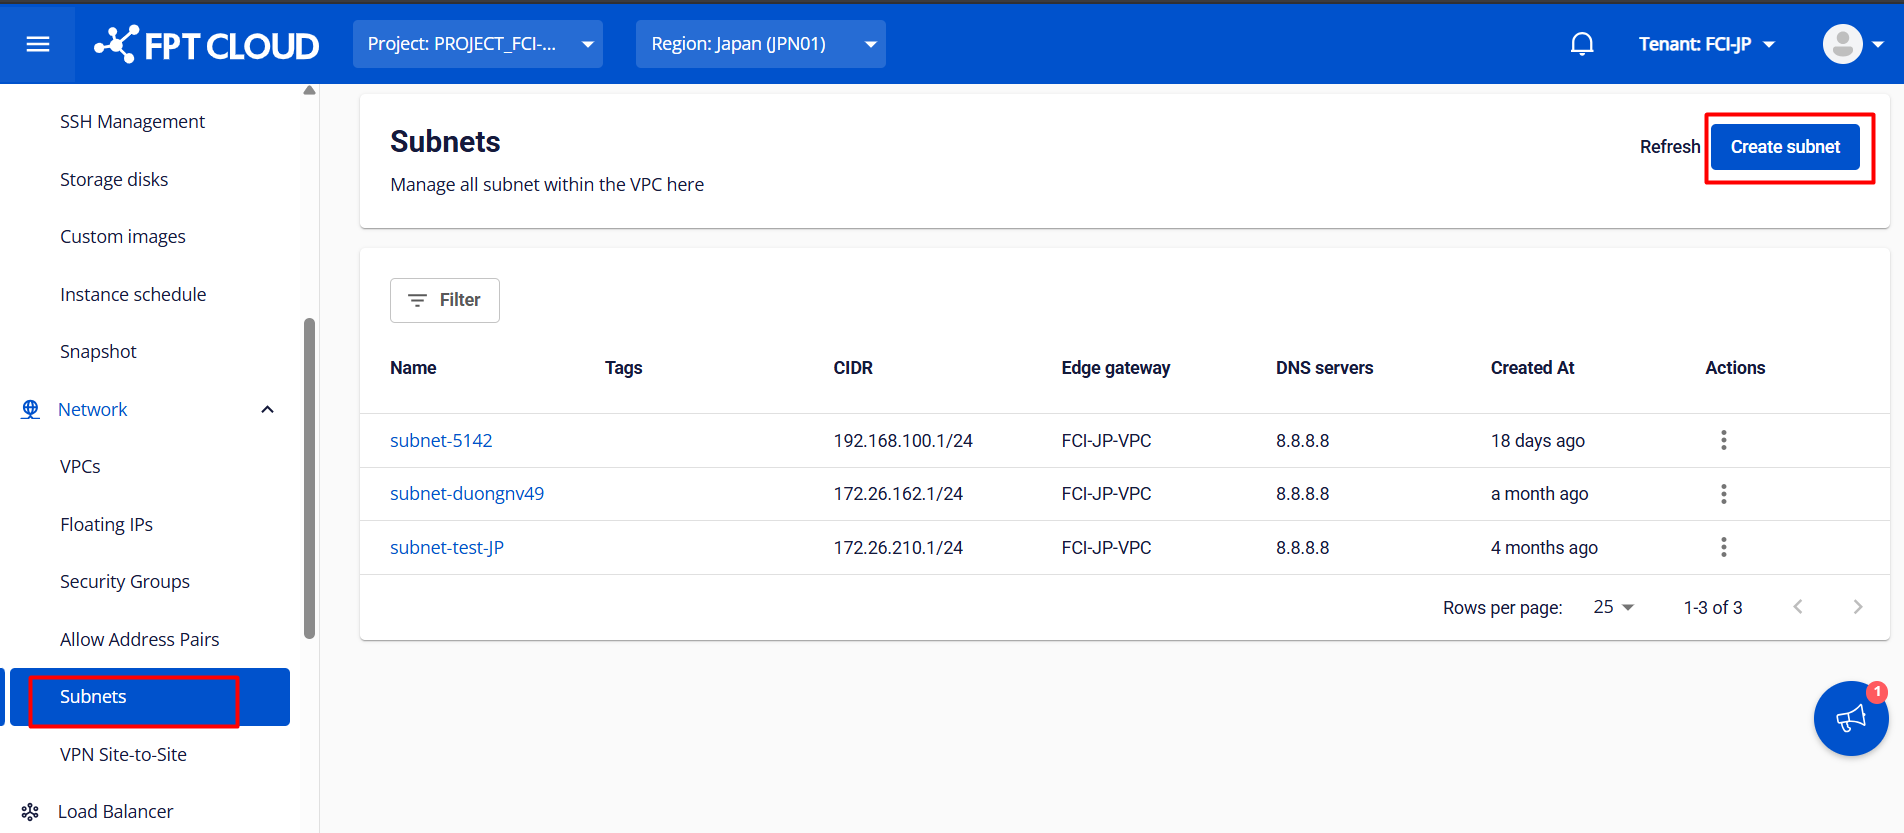
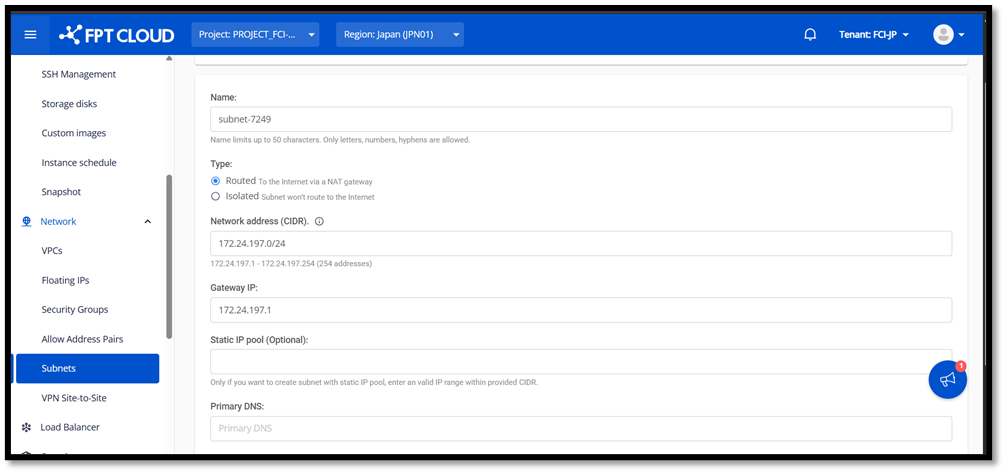
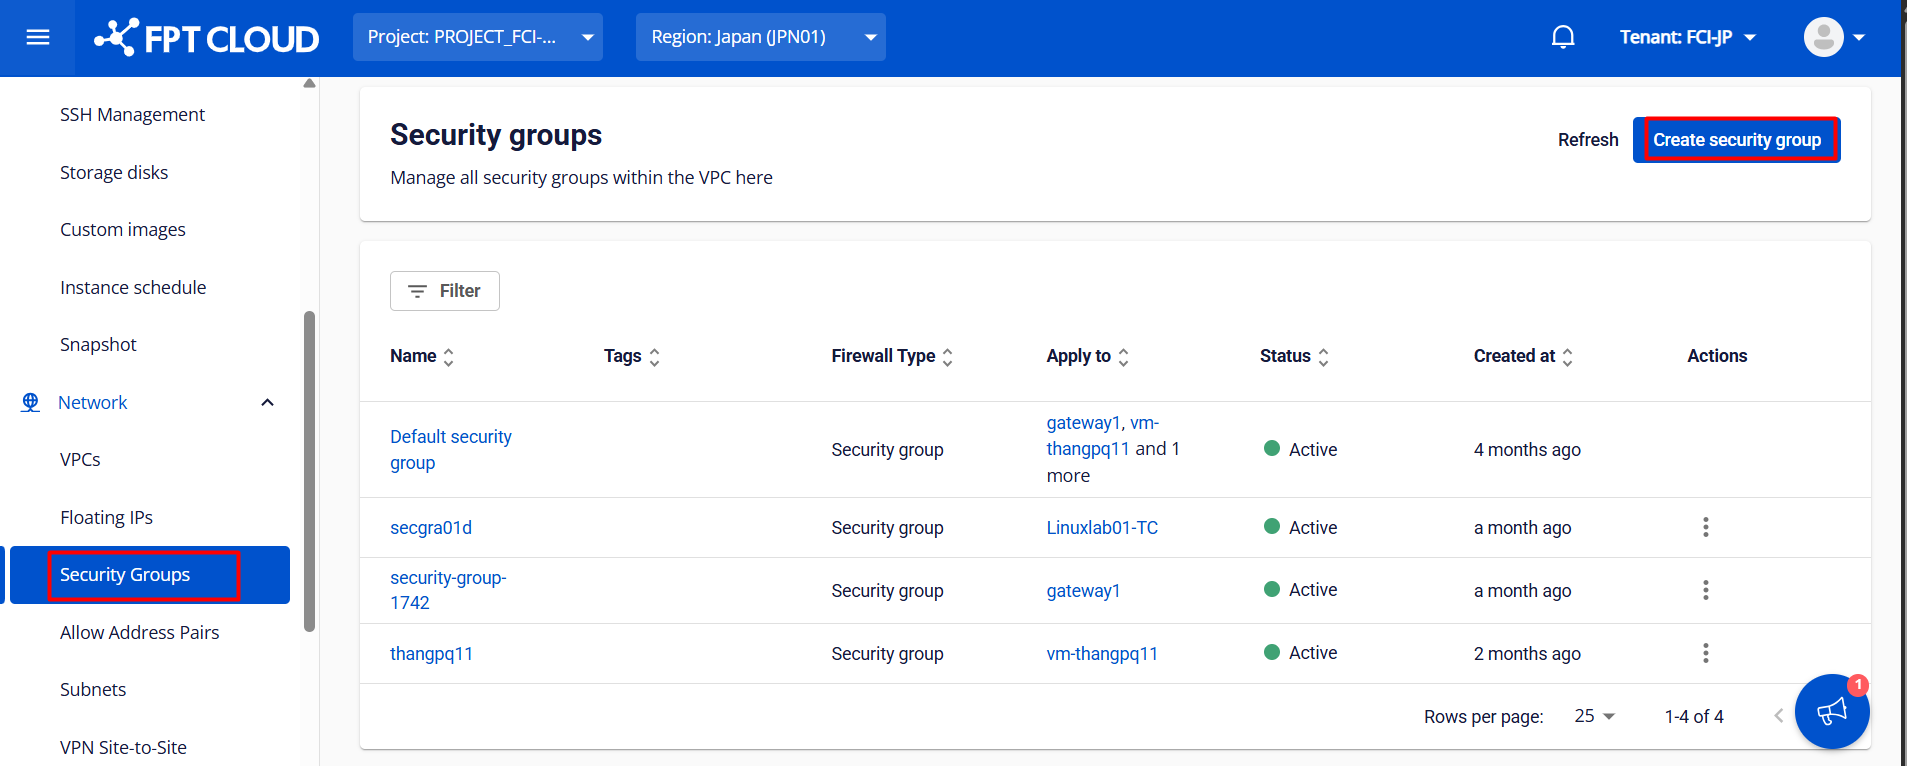
Network environment preparation
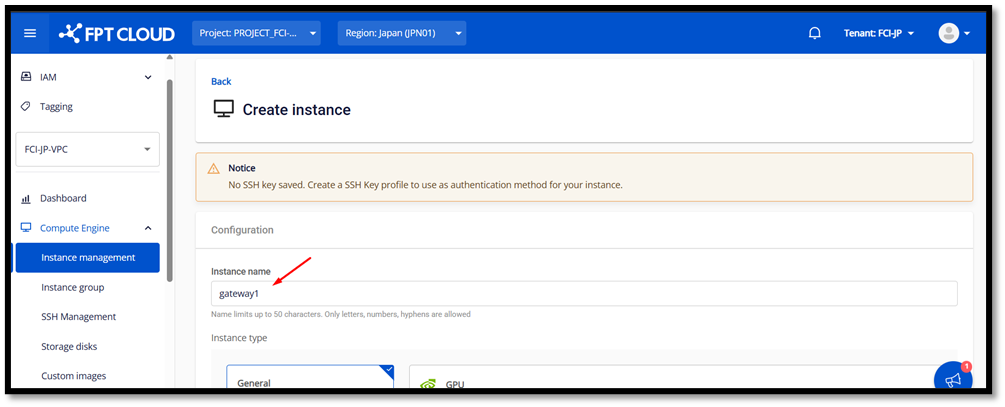
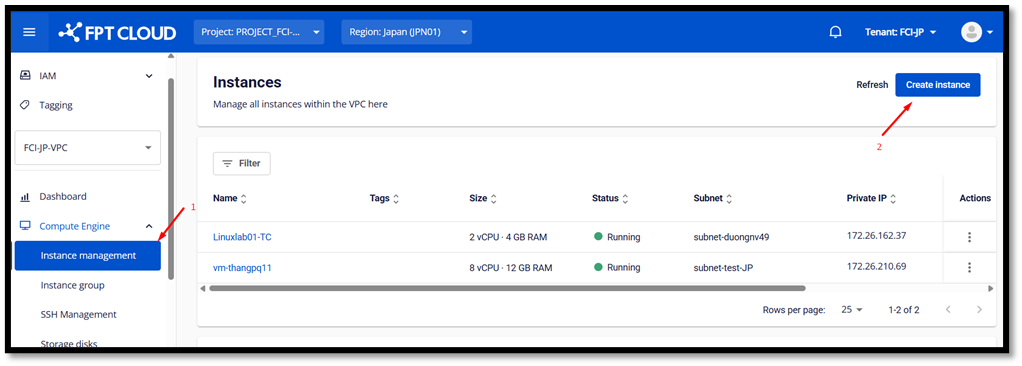
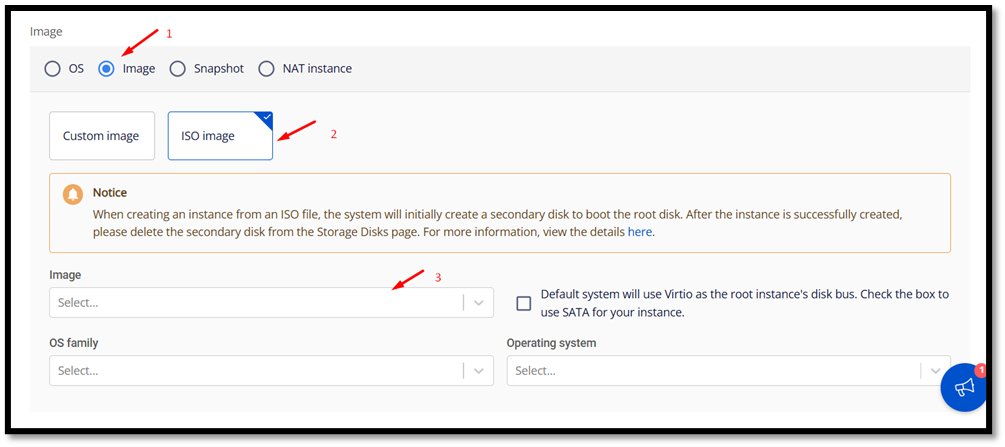
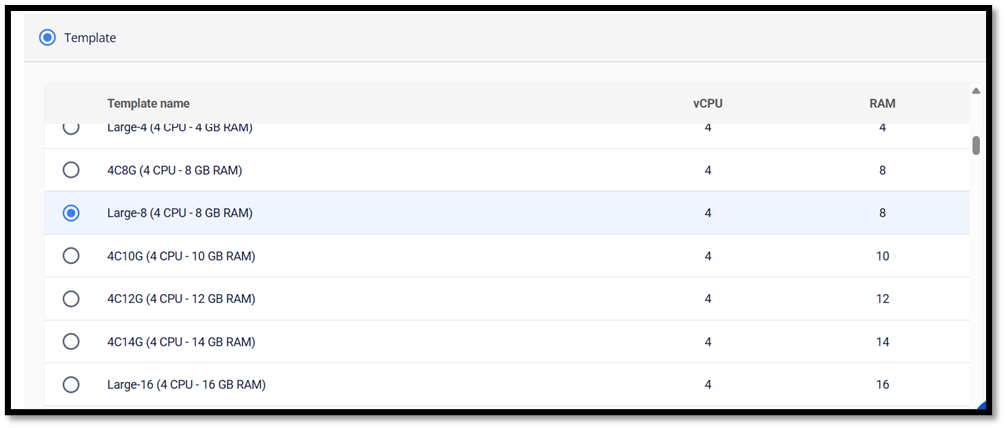
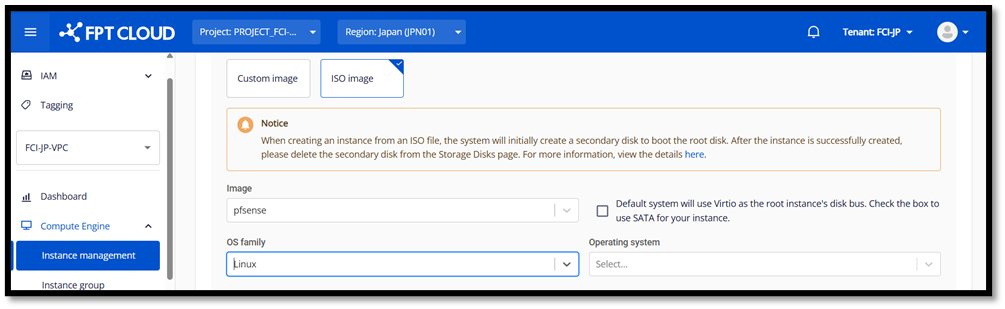
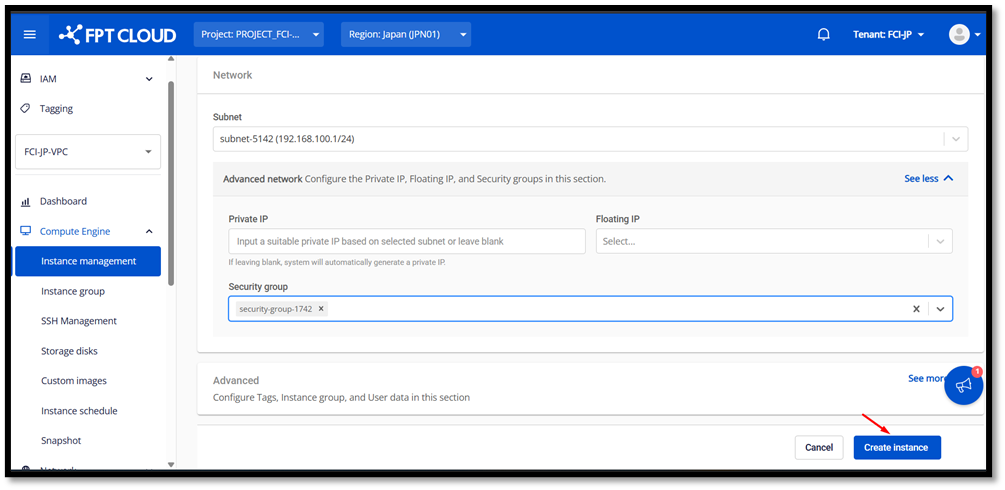
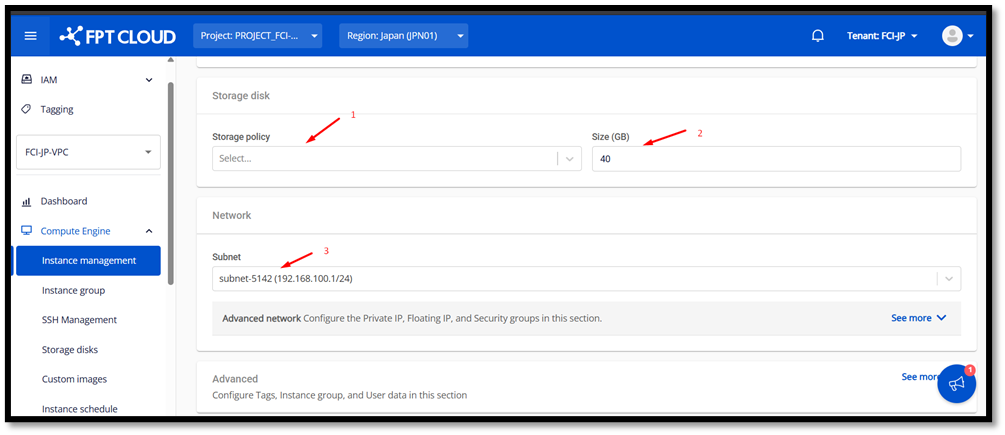
Creating a pfSense Virtual Machine

HA (High Availability) Requirements
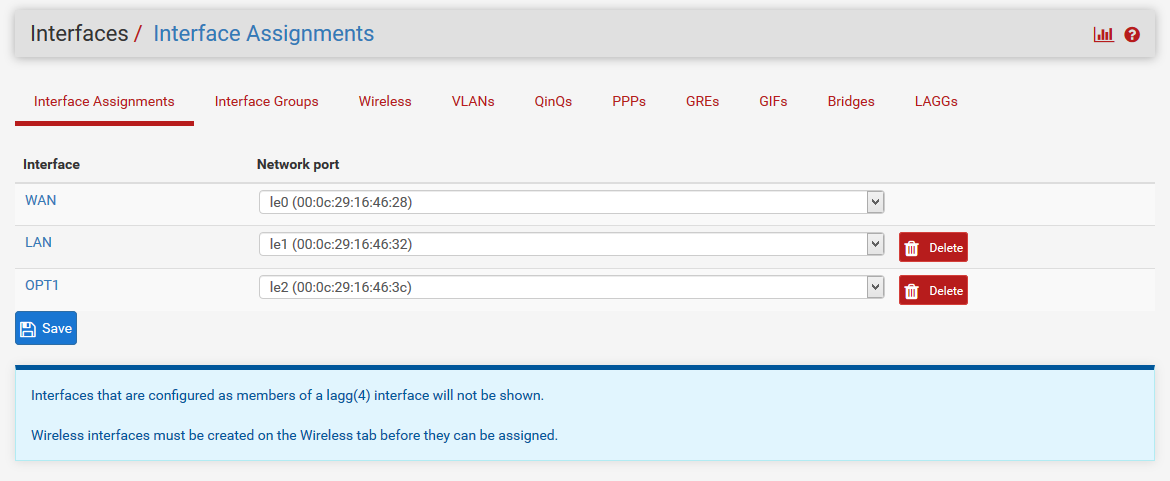
Configuring the pfSense Interface
New Network: Adding a card
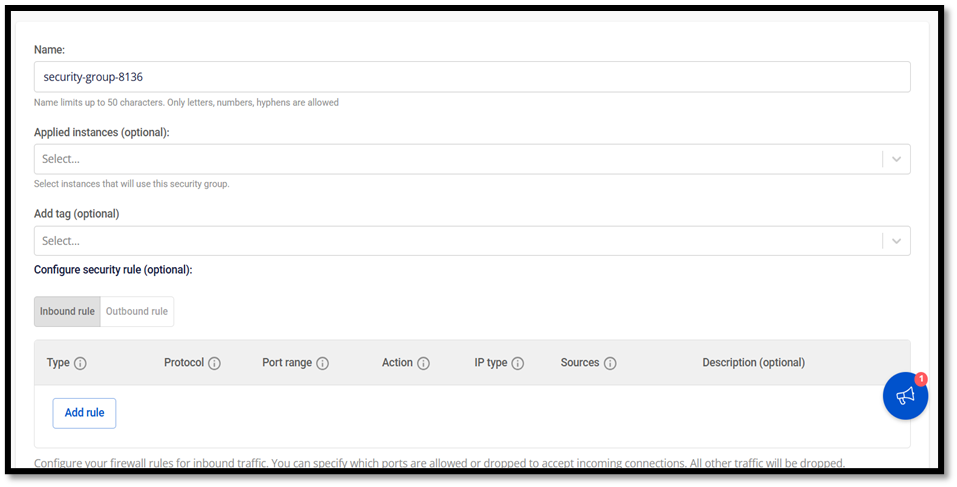
Firewall: Creating rules
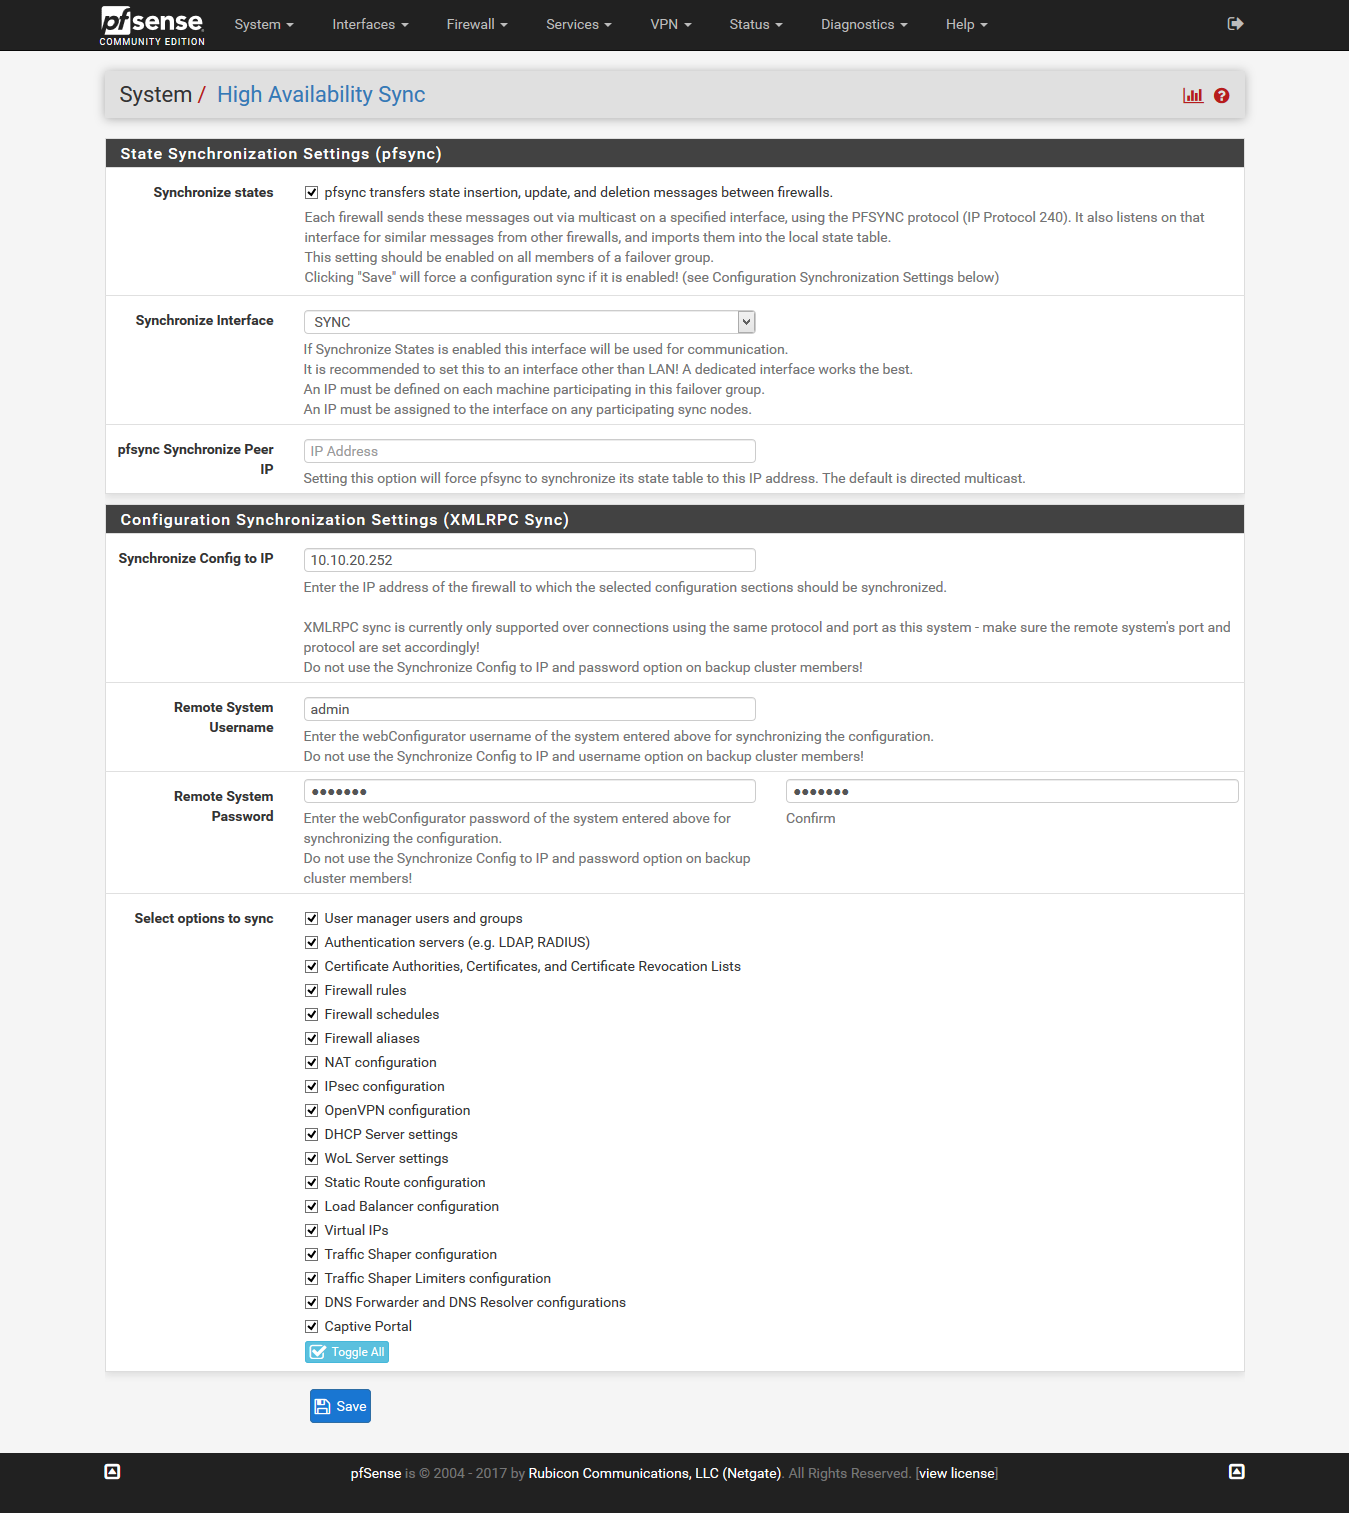
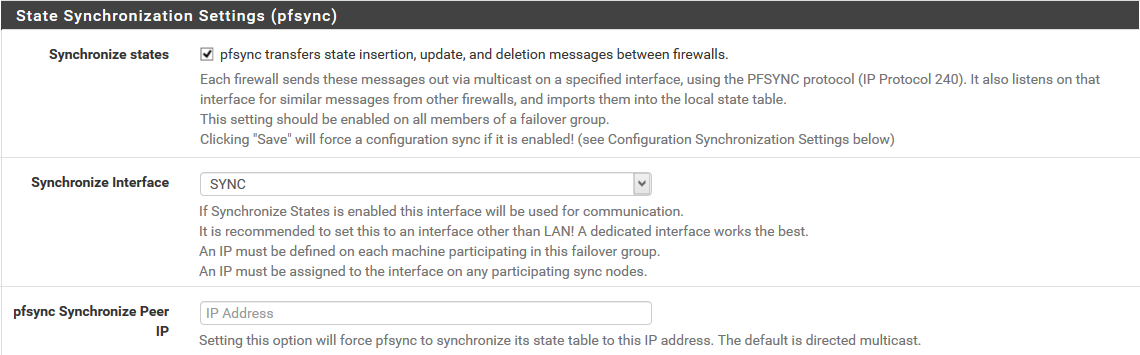
Configuring CARP (High Availability Protocol)
Configuring CARP on the Master
Configuring CARP on the Slave
Last updated
Was this helpful?